

Every other guide in this series deals with finding good setups — a support level holding, a moving average crossing, a candlestick pattern confirming a reversal. Risk management is different: it has almost nothing to do with finding good setups and everything to do with surviving the ones that don’t work out. It’s the least exciting part of trading and, by a wide margin, the part that separates traders who last from traders who don’t.
This guide covers how to think about risk per trade, how to size a position from a stop-loss distance rather than guessing, how risk/reward ratios actually work, and why protecting your capital matters more than any single winning trade.
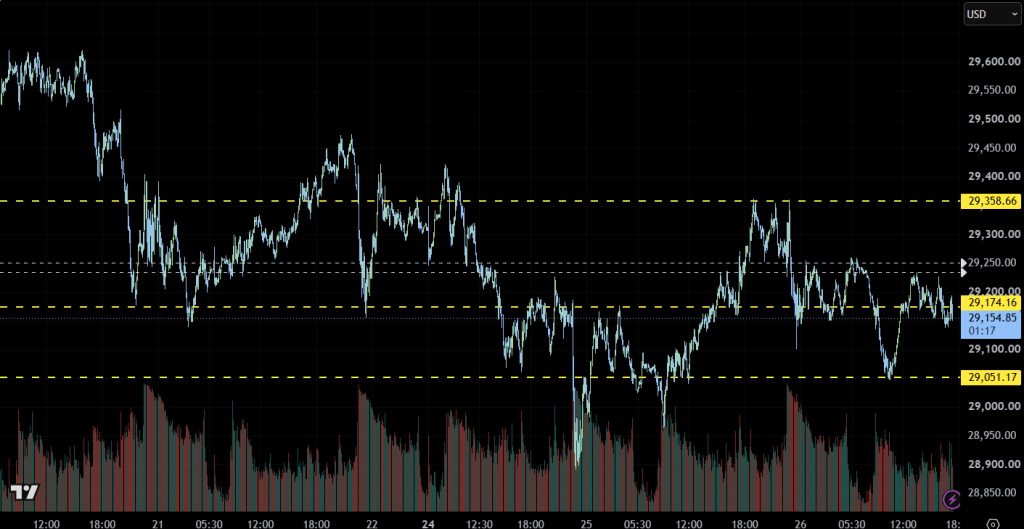
The chart above shows a simple illustrative long setup on NAS100: entry at 29,174.16, stop-loss at 29,051.17, and take-profit at 29,358.66. That’s 122.99 points of risk against 184.50 points of potential reward — a risk/reward ratio of roughly 1:1.5. Position sizing and risk management both start from that stop-loss distance, not from a gut-feel dollar amount.
The 1-2% Rule
A widely used baseline is risking no more than 1-2% of total account capital on any single trade. This isn’t an arbitrary superstition — it’s a mathematical buffer against the reality that even a genuinely good strategy will produce losing streaks. Risking 1-2% per trade means a string of five or six consecutive losses, which will happen eventually to every trader, costs a manageable slice of the account rather than a crippling one.
Risking a much larger percentage per trade might feel fine during a winning streak, but it takes only a handful of losses in a row to put an account in a hole that’s mathematically difficult to climb back out of — a 50% drawdown requires a 100% gain just to break even.
Position Sizing From Stop-Loss Distance
Rather than picking a position size first and hoping the risk works out, the more reliable process runs in the opposite direction:
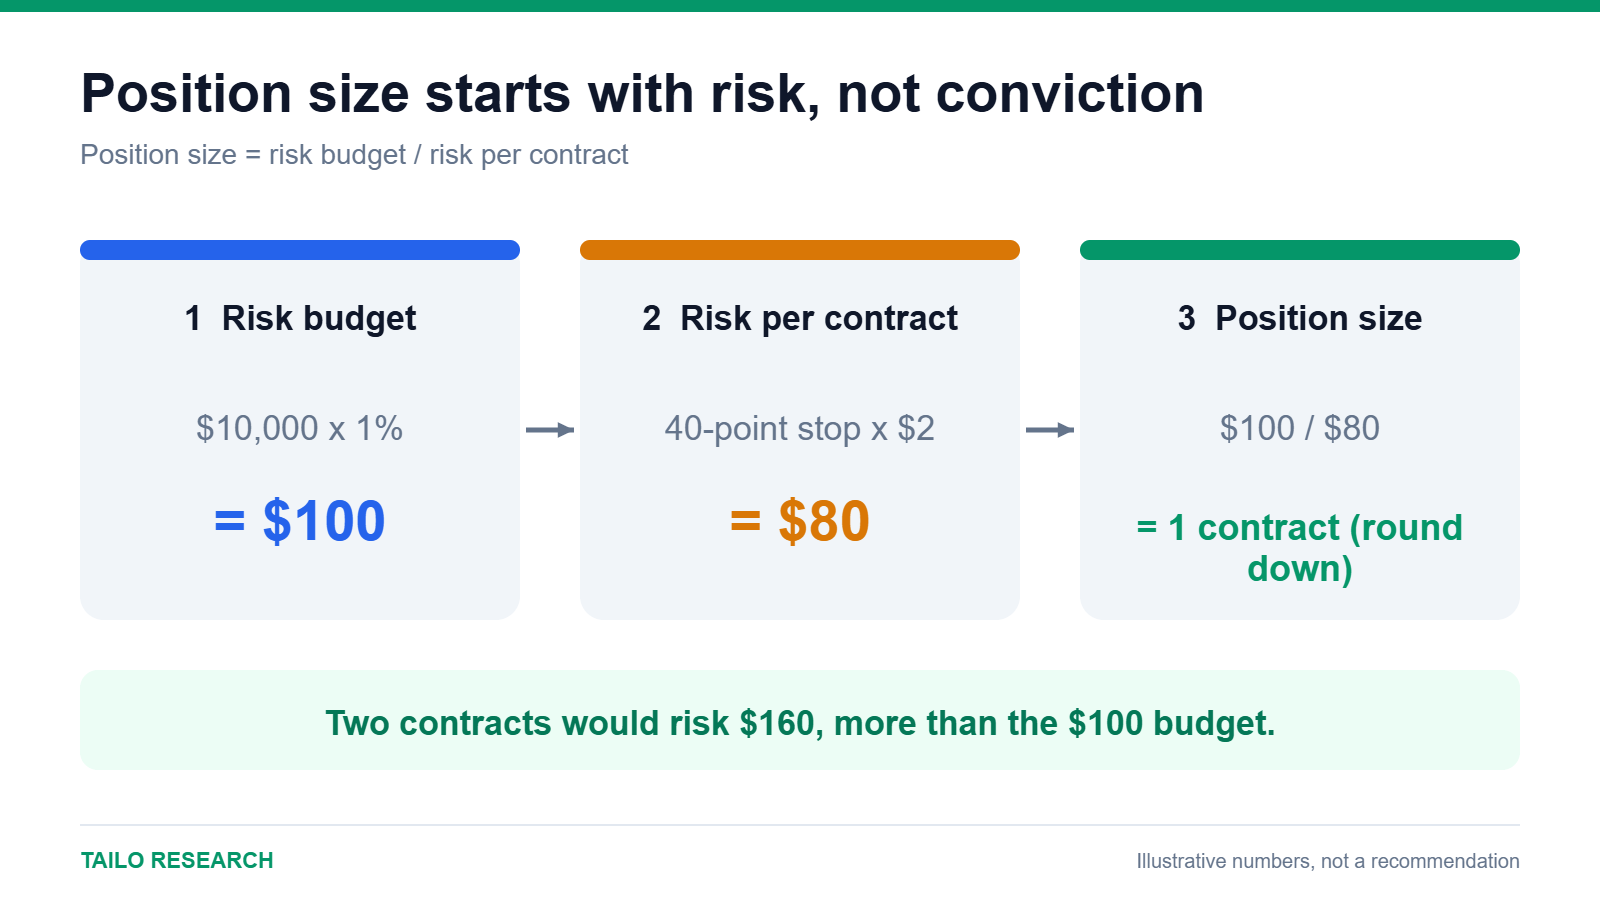
- Decide how much of the account you’re willing to risk on this trade (e.g. 1% of account equity).
- Identify the stop-loss level based on the chart — where the setup is actually invalidated, not an arbitrary distance.
- Measure the distance in points (or pips, or dollars) between your entry and that stop-loss.
- Divide your dollar risk amount by that distance to determine how large a position you can take.
Using the example above: if an account is $10,000 and the trader risks 1% ($100), with a stop-loss distance of 122.99 points, the position size is calculated so that a 122.99-point adverse move costs exactly $100 — not more, regardless of how “confident” the trade feels. This keeps every trade’s risk consistent, whether the stop is tight or wide.
Understanding Risk/Reward Ratios
The risk/reward ratio compares how much you stand to lose if the stop-loss is hit against how much you stand to gain if the take-profit is hit. A 1:2 ratio means risking one unit to potentially make two; the example chart above works out closer to 1:1.5.
This ratio matters because it directly determines the win rate needed to be profitable over time. At a 1:1 ratio, a trader needs to win more than 50% of trades just to break even before costs. At 1:2, breakeven only requires winning above roughly 33% of trades — meaning a strategy can be wrong more often than it’s right and still be profitable, as long as the winners are allowed to run further than the losers.
Why Protecting Capital Beats Any Single Trade
No individual setup, however clean it looks — a perfect support bounce, a textbook hammer reversal, an oversold RSI reading — comes with a guarantee. Every analysis technique in this series improves the odds of a trade working out; none of them make it certain. Risk management is what accounts for that uncertainty on every single trade, so that being wrong is an expected, survivable cost of doing business rather than an account-ending event.
This is also why moving a stop-loss further away mid-trade to “give it more room” is one of the more damaging habits a trader can develop — it quietly turns a planned, sized risk into an unplanned, unsized one.
Common Mistakes to Avoid
- Sizing positions by “how it feels” rather than calculating from the stop-loss distance and a fixed risk percentage.
- Moving stop-losses further away once a trade is already losing, hoping for a reversal instead of accepting the original plan.
- Risking a large percentage of the account on a single “high-conviction” trade, which undoes the benefit of careful sizing on every other trade.
- Ignoring risk/reward entirely and taking trades where the potential loss is larger than the potential gain, requiring an unrealistically high win rate to break even.
Good analysis can improve how often you’re right. Risk management determines whether being wrong some of the time — which is inevitable for every trader — costs you a small, planned amount or a large, unplanned one. It’s the single most controllable variable in trading, which is exactly why it deserves as much attention as finding the setup itself.
For related reading, see our guides to Support and Resistance Levels, Candlestick Patterns, and RSI.
If you want to put these risk management concepts into practice, Vantage Markets gives you access to NAS100 and other major markets with competitive spreads and fast execution. Open a free Vantage Markets account and start applying what you’ve learned.
This content is for informational and educational purposes only and does not constitute financial advice. Trading CFDs carries a high level of risk and may not be suitable for all investors. Past performance is not indicative of future results. Please read our full Risk Disclaimer and Affiliate Disclosure before making any trading decisions.


Leave a Reply